Cypress has a plugin called mailosaur, which helps do all the end-to-end testing stuff needed on the email area like resetting the password, reading subject, account verification, you name it.
This article will see how we can set up mailosaur in our cypress environment and get started.
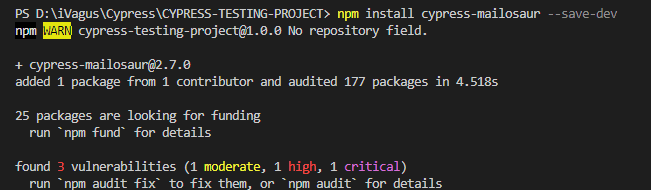
In our cypress environment, type in the following and install mailosaur.
npm install cypress-mailosaur --save-devThis will install mailosaur special cypress commands.
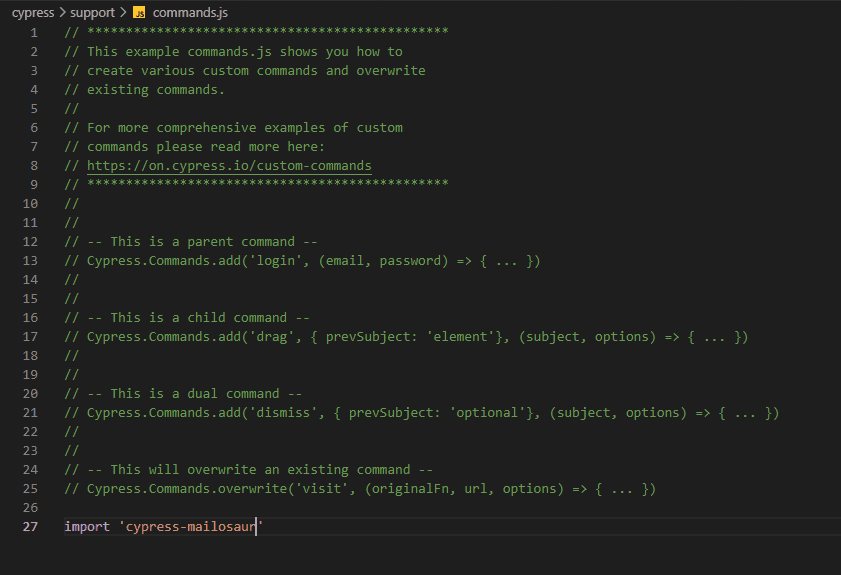
Go to command.js in the support folder and type in the following.
import 'cypress-mailosaur'This will let cypress know about mailosaur.
Then go to index.js in the same folder and type in the following.
Note: if you are using version Cypress 10 or above add it to e2e.js. For typescript it will be e2e.ts.
require('cypress-mailosaur')- This is a crucial step, or else we get a function not recognized error when mailosaur functions are used.
- For example, we will do tests on the mailosaur server, which is free for a limited time. Sign up and get started.

- Here we have already created a test server to start working on it.
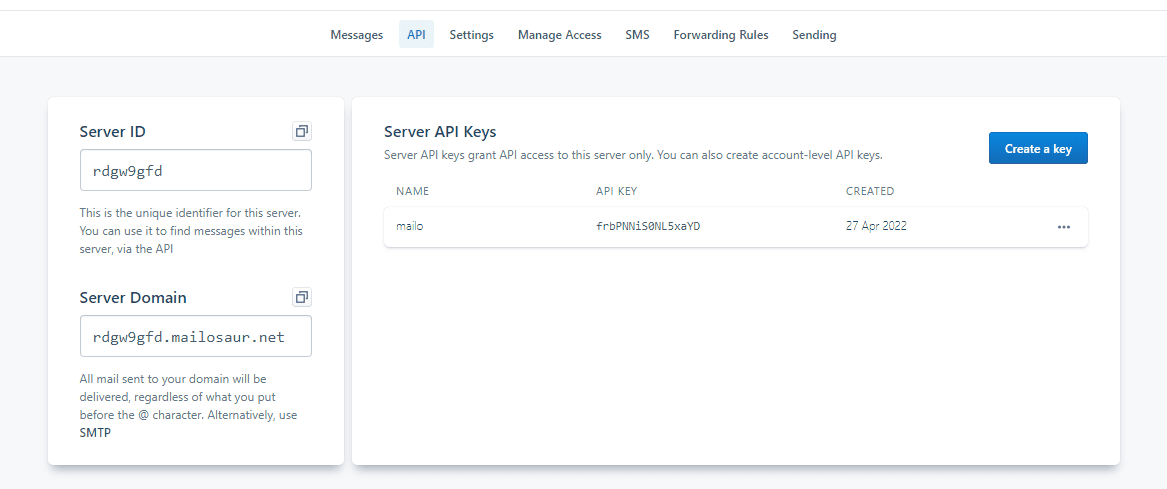
- Create an API key by clicking on 'create a key' and copy it.
- Go to cypress.json and type in the following.
{
    "env": {
        "MAILOSAUR_API_KEY": "frbPNNiS0NL5xaYD"
    }
}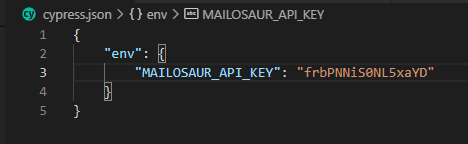
- This will provide the API key for the mailosaur for cypress testing.
Now let us reset the mail password using mailosaur and mailosaur test server as mail site.
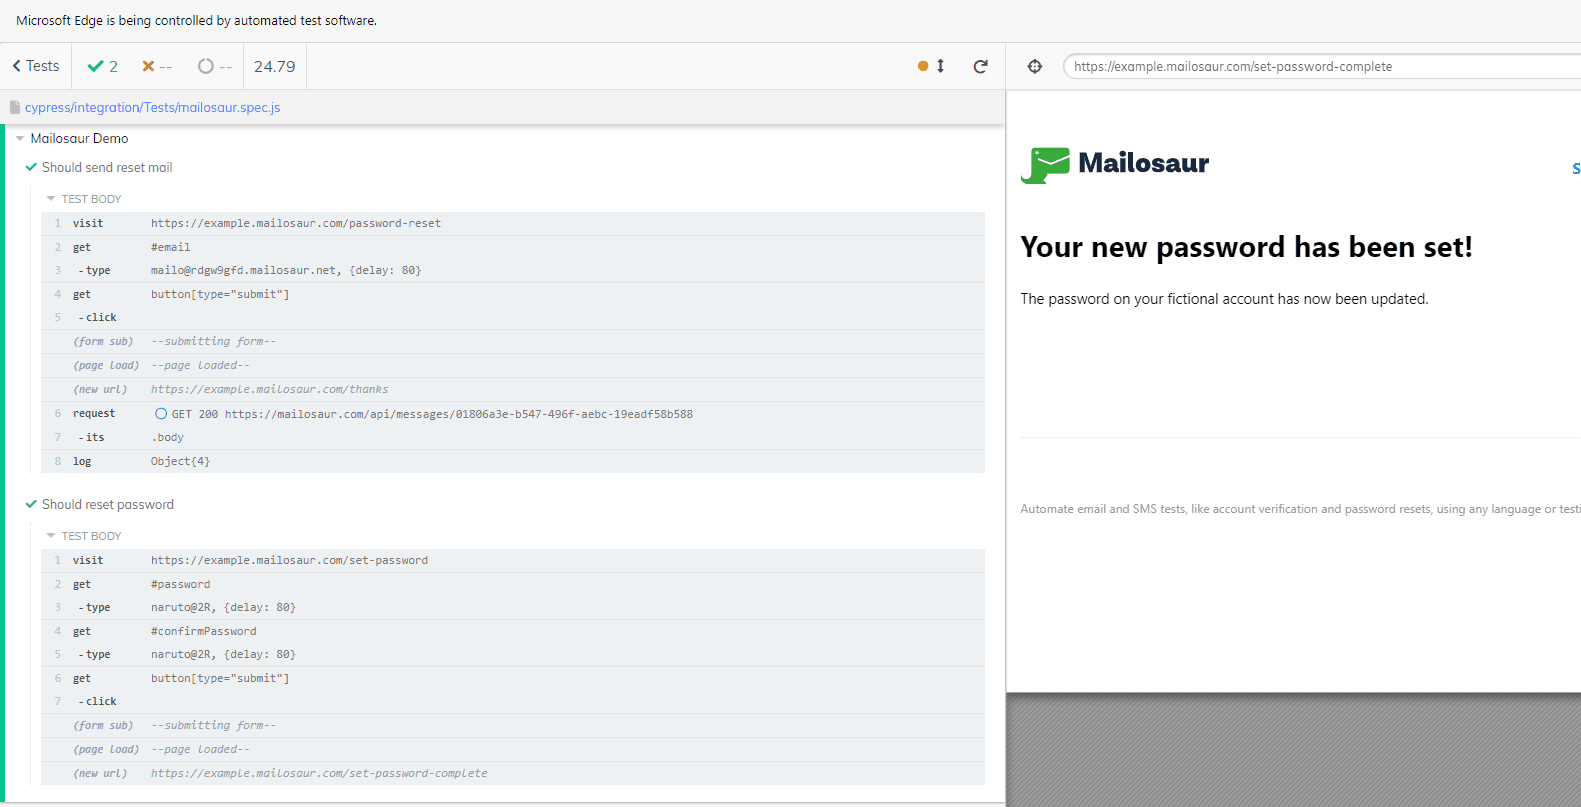
describe('Mailosaur Demo',() => {
    const serverId = "rdgw9gfd"
    const serverDomain = "rdgw9gfd.mailosaur.net"
    const email = 'mailo@' +serverDomain

    let resetLink
    it('Should send reset mail',()=>{
        cy.visit('https://example.mailosaur.com/password-reset')
        cy.get('#email').type(email)
        cy.get('button[type="submit"]').click()
        cy.mailosaurGetMessage(serverId, {
            sentTo: email
        }).then(emaill => {
            cy.log(emaill.html)
            resetLink = emaill.html.links[0].href
        })
    })
    it('Should reset password',()=>{

        cy.visit(resetLink)
        cy.get('#password').type('naruto@2R')
        cy.get('#confirmPassword').type('naruto@2R')
        cy.get('button[type="submit"]').click()


    })
})- So we can see that the serverid and domain from mailosaur have been stored in a variable separately.
- We can have anything before the '@' for email id, followed by the serverdomain, which will work and send messages.
- Next, we have declared a static variable resetLink.
- In the first test step, we visit the site where we need to reset the password.
- The email has been typed and submitted.
- Once that is done, an email is sent to our mailosaur test server.
- We can confirm it by using the cy.mailosaurGetMessage function and logging it.
- The link within its body has been stored inside the static variable we declared.
- In the following test step, we visit the reset link we extracted using the then command, which yielded the mailosaurGetMessage result.
- We navigate to that link and reset the password successfully when we do that.
Conclusion:
So this is how mailosaur works, and this is just one way of showing its true power.
- Log in to post comments