In previous articles, you learned about, How to download MongoDB Server for Windows 11.
WHY MONGOSH?
The installation of MongoDB Server also contains Mongo shell. The shell is used by clients to communicate with the database. You can find the old version of Mongo Shell inside the bin folder in the working directory that you choose at the time of installation. You can find it as follows:
Now, if you click this version of Mongo Shell, which is installed at the time of MongoDB server is installed. It will display the following warning:

This warning mentions that the mongo shell is now depreciated and is overtaken by the mongosh. However, It will not be supported by the latest versions of MongoDB.
HOW TO INSTALL MONGOSH?
STEP 1: Click on Mongodb.com. The MongoDB Offical page will appear in front of you:
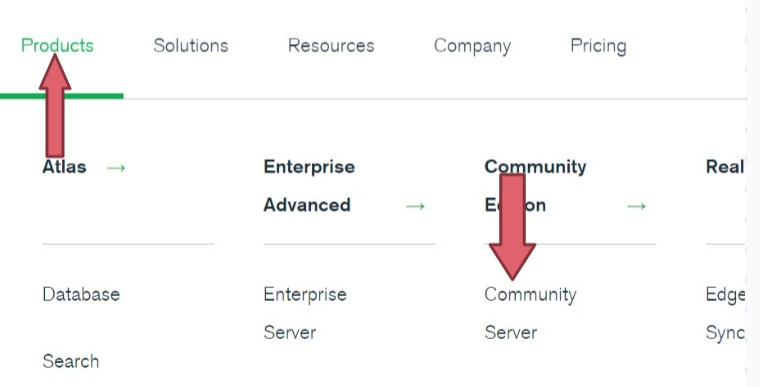
STEP 2: Hover on Product and click on community server displayed on the screen:
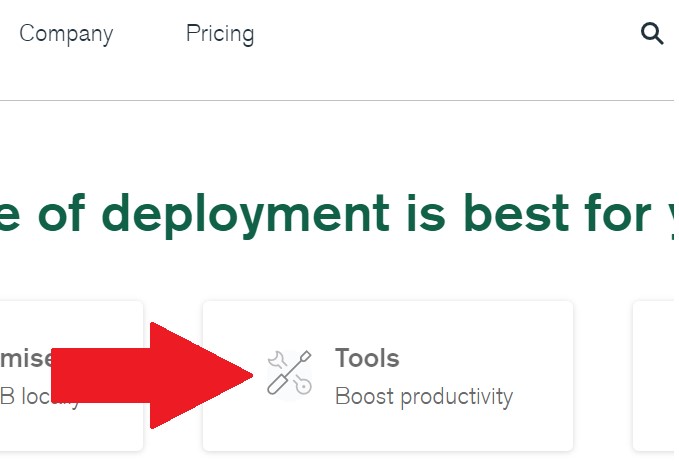
STEP 3: Now, Click on Tools Section on the screen:
STEP 4: Scrolling down, Click on MongoDB Shell:

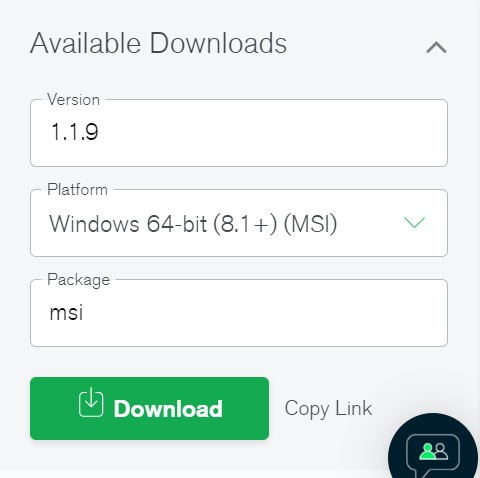
STEP 5: Now, select the Correct Version, Platform and Package and click on the Download button:
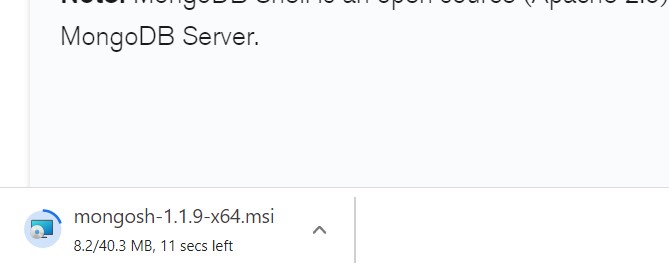
STEP 6: The downloading for Mongosh will start as you will click on the download button:
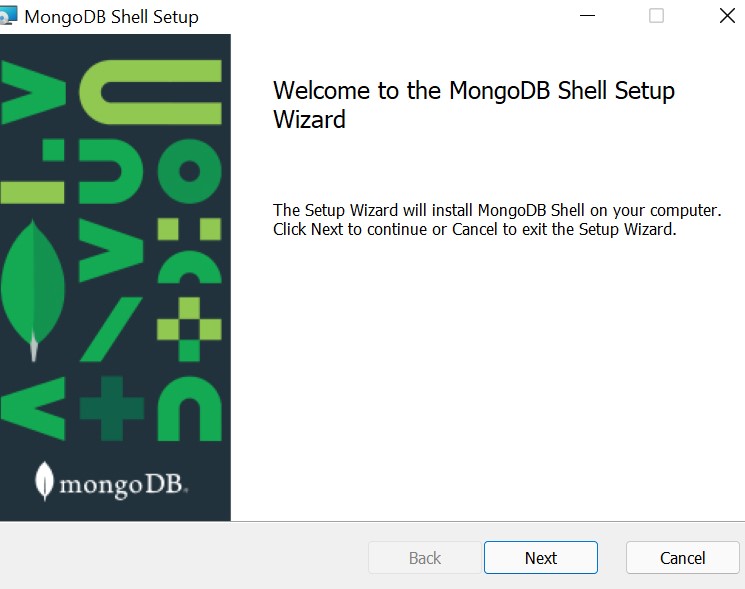
STEP 7: Now after the downloading part is complete. Click on the downloaded file. The screen as shown below appears in front of you. Click on NEXT Button:
STEP 8: Select the location and then click the NEXT Button:

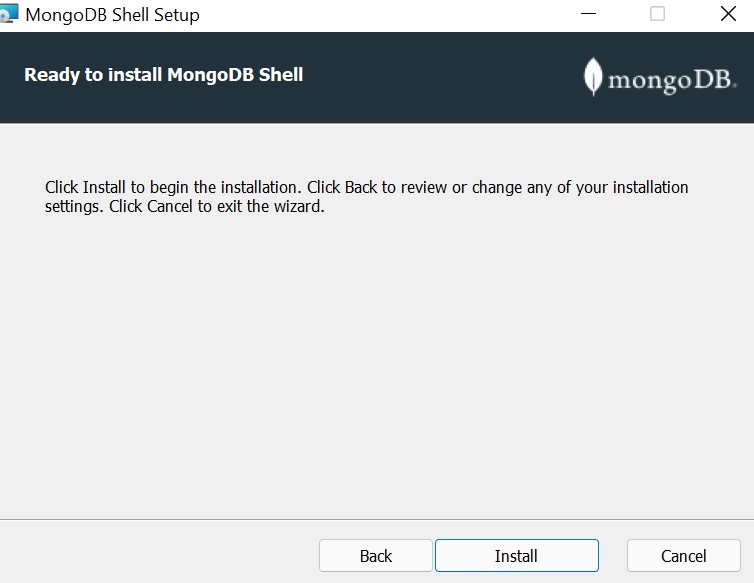
STEP 9: Click the install button as shown below:
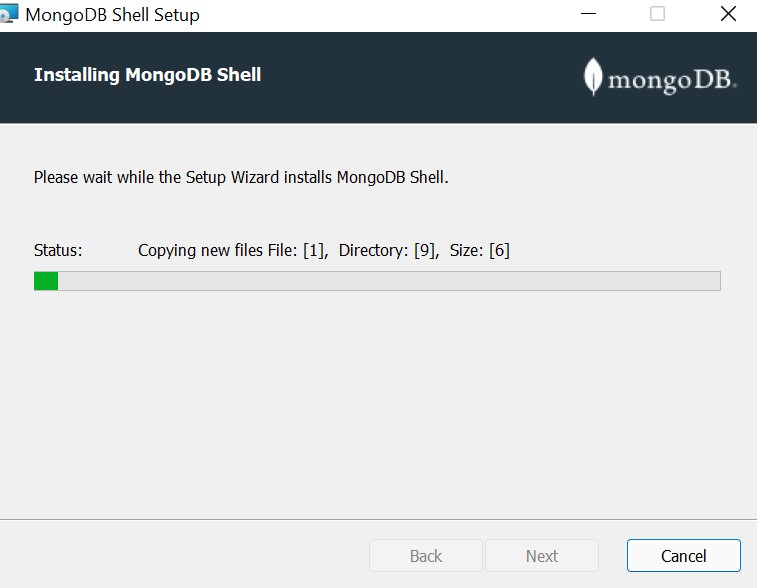
STEP 10: You will notice that the installation of Mongosh will start as soon as you will click the install button:
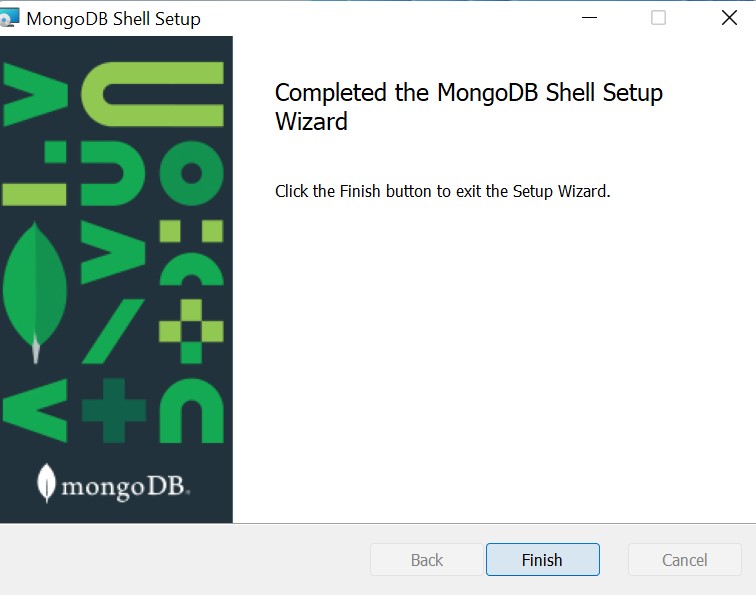
STEP 11: Now click on Finish Button and enjoy with the newly downloaded version for Mongosh in Windows 11:
- Log in to post comments