The steps for installing Playwright are the same no matter which operating system you use. Ensure you have Node JS, and Visual Studio Code installed on your system before proceeding with steps. You can install Node and VS code from the Installation & Setup section.
Install and Setup New Playwright Project
If you don't want to install using VS Code type below command in terminal or command prompt and jump to Step 5. In below command, replace the new-project with your project name of your choice.
$npm init playwright@latest new-projectStep 1: Go to the desired location and create a new folder where you want to set up the Playwright.
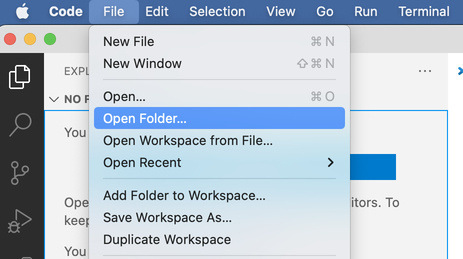
Step 2: In the VS Code IDE, open the newly created folder, one way of opening it is, Go to File -> Open Folder.
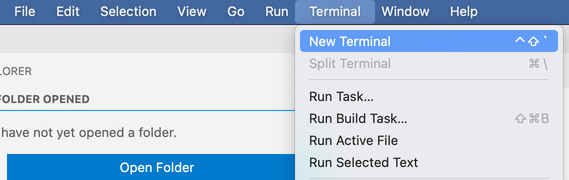
Step 3: Open VS Code Terminal from Terminal -> New Terminal
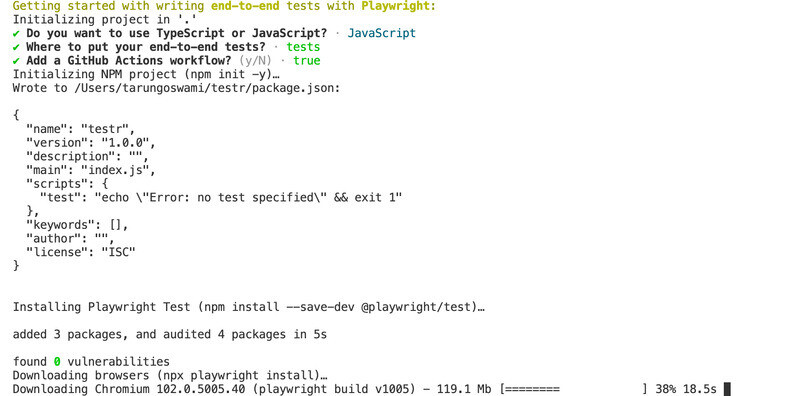
Step 4: Open the terminal and type the below command to install playwright
$ npm init playwright@latestHere, @latest will install the latest stable release.
Step 5: Press down arrow to Select JavaScript. By default TypeScript will be selected. Press Enter after selection.

Step 6: Press Enter to put your tests in the tests folder
? Where to put your end-to-end tests? › testsStep 7: Press y for GitHub basic setup
? Add a GitHub Actions workflow? (y/N) › falseIt will start downloading browser binaries to your system. For Mac OS, it will install in ~/Library/Caches/ms-playwright directory
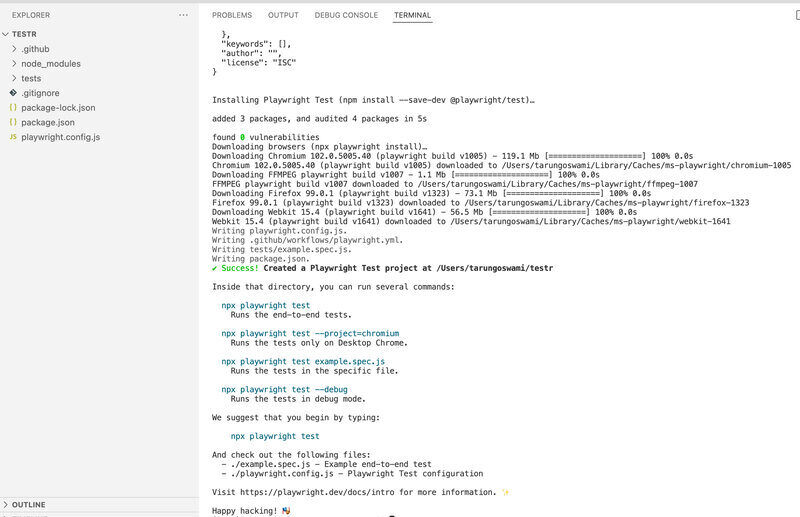
Once installation is done successfully. It will show a success message and suggest several commands, and a few files will be created on your system.
Install Playwright for existing node project
$ npm i -D @playwright/test
$ npx playwright install- Log in to post comments