This article will discuss creating a maven rest assured project using intellij ide.
1. Open IntelliJ and select "Create New Project" from the welcome screen.
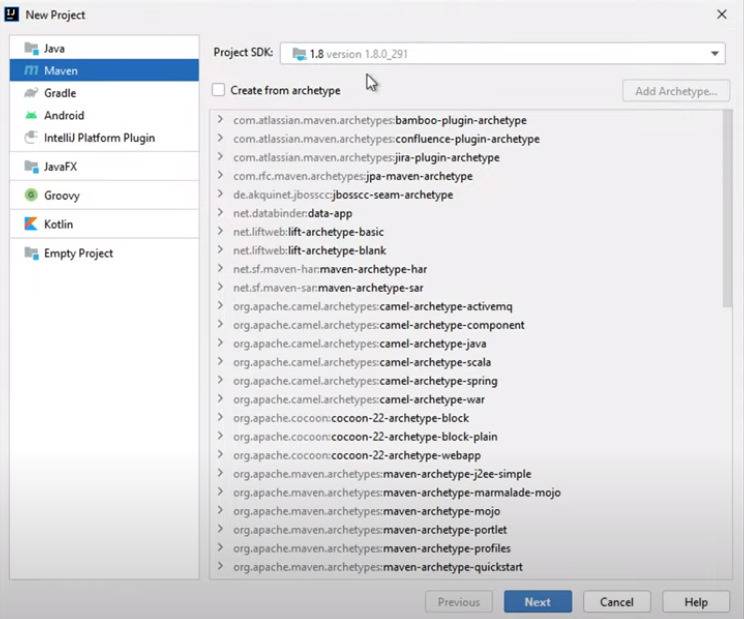
Create REST Assured Maven Project in IntelliJ
2. In the "New Project" dialog box, select "Maven" from the left menu and proceed with "Next."
3. Enter a Group Id and Artifact Id for your project. The Group Id is typically a reverse domain name, like com.example, and the Artifact Id is the name of your project, like my-project. Click "Next."
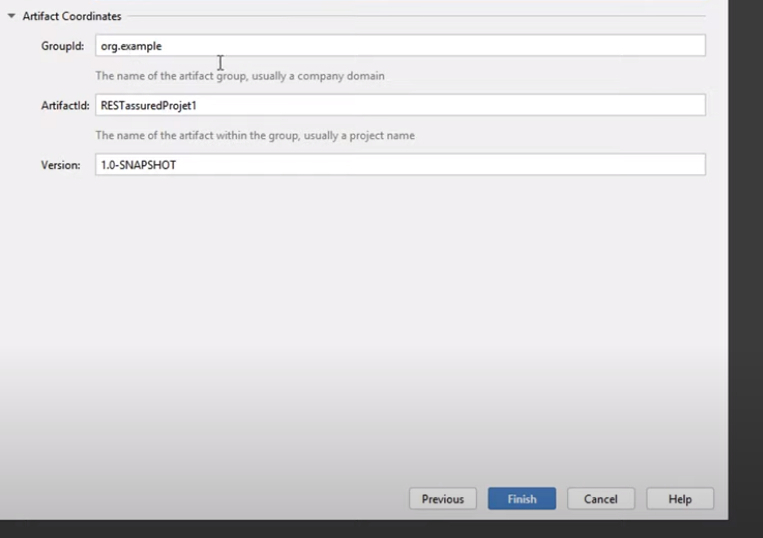
Select the directory to save your project and click "Finish."
4. Once your project is created, open the pom file and add the below dependencies:
<dependency>
   <groupId>io.rest-assured</groupId>
   <artifactId>rest-assured</artifactId>
   <version>4.4.0</version>
</dependency>
<dependency>
   <groupId>testng</groupId>
   <artifactId>testng</artifactId>
   <version>7.4.0</version>
</dependency>
These dependencies will allow you to use REST Assured and TestNG in your project.
5. After all the steps, let us check how it works by creating a new Java class.
import io.restassured.RestAssured;
import io.restassured.response.Response;
import org.testng.annotations.Test;
public class MyRestAssuredTest {
   @Test
   public void testGet() {
      Response response = RestAssured.get( path: "https://reqres.in/api/users?page=2");
System.out.println("Response : "+response.asString());
System.out.println("Status Code : "+response.getStatusCode ());
System.out.println("Body: "+response.getBody().asString());
System.out.println("Time taken: "+response.getTime());
System.out.println("Header: "+response.getHeader(s: "content-type"));
   }
}
7. Run your test by right-clicking on the test method and selecting "Run 'MyRestAssuredTest.testGet()'." That's it! You now have a REST Assured Maven project set up in IntelliJ.

- Log in to post comments