Steps to add your existing project to GitHub are similar, no matter if you are using git bash on Windows or any other CLI on any OS. In this video we will commit our existing project to GitHub using Mac Terminal. If git is not already installed on your MAC System you can follow this link.
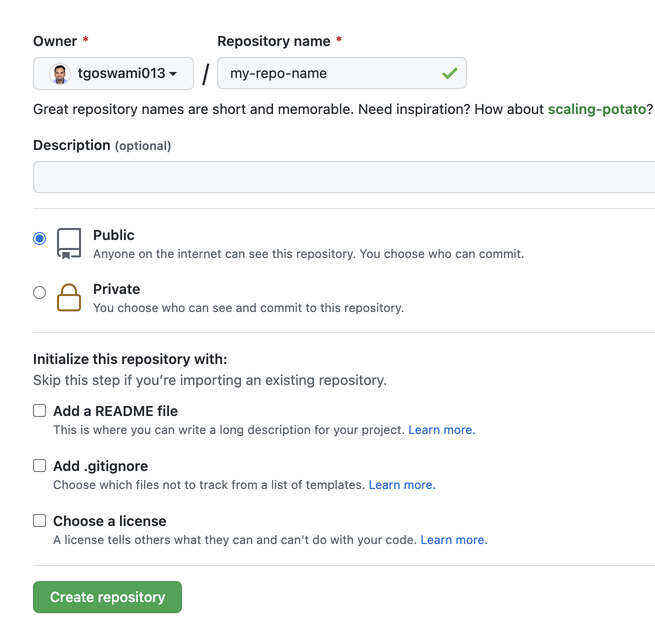
Step 1: First you have to create a new repo or if it is already created by someone in your organization you can skip this step. To avoid errors, do not initialize the new repository with README, license, or gitignore files. You can add these files after your project has been pushed to GitHub.

Step 2: Now go to your mac terminal and in your project directory.
Step 3: Intialize the local directory as your git directory
$ git init -b mainStep 4: Add files to your new local repository
$ git add .Step 5: Commit the files you have staged in your local repository
git commit -m "First commit"Step 6: Visit github.com and copy URL from code section or you will find it at top for new repo.

Step 7: In terminal replace <REMOTE_URL> with URL you have copied
$ git remote add origin  <REMOTE_URL>
$ git remote -v
remote -V is to verify the new remote URL.
Step 8: Push changes to github using below command.
$ git push -u origin mainRefresh on GitHub to see your changes.
- Log in to post comments